Happy unexpected snow day to me! Kids in the Holyoke school district already had today off, but it was scheduled as a teacher in-service day. Last night around 6 pm, though, they called for a snow day. We had a wonderful, wet snow perfect for making a snowman and having snowball fights.
After so much fun outside, it was time to come in and warm up. As I have mentioned multiple times, my girls are crafters. They love anything to do with crafting. Since we had the whole afternoon to ourselves, I decided to plan a craft. I always like to try to sneak a little education in there too, so I coordinated a storytime and craft.
 |
| The kids' Olaf snowman |
After so much fun outside, it was time to come in and warm up. As I have mentioned multiple times, my girls are crafters. They love anything to do with crafting. Since we had the whole afternoon to ourselves, I decided to plan a craft. I always like to try to sneak a little education in there too, so I coordinated a storytime and craft.
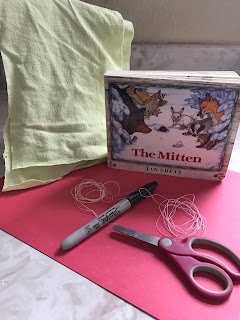
The book we are reading is The Mitten by Jan Brett. This is one of my kids' favorites and is a great way to incorporate many multi-level crafts. In fact, when I started gathering the book and supplies, Boo told me about a fun activity they did in preschool after reading the story: they pretended to be the animals fitting inside the mitten (under a blanket) and when the bear sneezed they all jumped up and threw off the blanket. It made her excited for the story and craft and made me proud of her recollection.
Craft: Making Mittens
The girls have been interested in sewing and creating, so I thought a simple mitten project would be the perfect activity.
The supplies we needed include:
- markers
- 8 pieces of scrap material
- construction paper
- thick sewing thread
- large needle with a large eye
- styrofoam for sticking
To begin, I traced the girls' hands on the felt in a mitten shape. Since Bubs is too small to sew, I traced his mittens on construction paper for him to color as the girls worked on their craft.
Once the mittens were traced, the girls began to cut them out. I had to help Boo because she wanted to make sure it was straight and the fabric was difficult to cut with the safety scissors.
After that, I helped the girls thread their needles, and we worked on some practice stitches on the scraps. We talked about techniques to avoid poking ourselves and style to make sure our stitches are evenly spaced. When they felt ready, I had them get started on their mittens.
I made the first few stitches to keep the two pieces together, but after that Bah was ready to go. Boo needed a little extra help around the curves but did a great job overall.
When they were finished, we turned the mittens inside out for the final product. They turned out so cute that the girls wanted to decorate them.
 |
| Boo's final product |
 |
| Bah's final product |
This was an easy and fun craft that kept the kids busy for most of the afternoon. It also sparked a bigger interest in sewing and inspired the girls to create a few items for their dolls including pillows and clothes.


Comments
Post a Comment